
 source.thenbs.com ```html
 Introduction: The Durable and Cost-Effective Bauder Flat Roof
Flat roofs offer a modern aesthetic and can be highly functional, providing space for gardens, terraces, or solar panels. While there are many flat roofing options, a built-up roof (BUR) using Bauder materials is a time-tested and reliable method. This guide will walk you through the steps of creating a DIY Bauder flat roof. Keep in mind that working on a roof can be dangerous. If you are uncomfortable with heights or complex construction projects, it's best to hire a professional. Also, ensure you comply with all local building codes and regulations.
Step 1: Planning and Preparation
Before you begin, careful planning is essential. This includes accurately measuring the roof area, selecting the appropriate Bauder roofing system (based on your climate and building structure), and gathering all the necessary materials and tools. This step can save you significant time and frustration later on.
Step 2: Gathering Materials and Tools
You'll need the following materials and tools:
- Bauder insulation boards (thickness depends on your climate and insulation requirements)
- Bauder waterproofing membrane (typically multiple layers)
- Bauder adhesive (compatible with the membrane and insulation)
- Bauder edge trims and flashings
- Bauder gravel or ballast (if applicable)
- Roofing nails or screws (compatible with your roof deck)
- Primer (as recommended by Bauder)
- Measuring tape
- Utility knife
- Caulking gun
- Roller or brush for applying adhesive
- Seam roller
- Gloves
- Safety glasses
- Ladder
- Scaffolding (optional, but highly recommended for safety)
Step 3: Preparing the Roof Deck
The existing roof deck must be clean, dry, and structurally sound. Remove any existing roofing materials, debris, or loose nails. Inspect the deck for any signs of rot or damage and repair it before proceeding. A smooth and even surface is crucial for proper adhesion of the insulation and membrane.
Step 4: Installing Insulation
Apply primer to the roof deck as specified by the Bauder manufacturer. Once the primer is dry, install the Bauder insulation boards according to the manufacturer's instructions. Typically, this involves applying adhesive to the back of the boards and pressing them firmly onto the roof deck. Stagger the joints between the boards to prevent continuous seams. Secure the insulation boards with roofing nails or screws if necessary.
Step 5: Applying the First Layer of Waterproofing Membrane
The specific installation method for the waterproofing membrane will depend on the type of membrane you've chosen (e.g., self-adhesive, torch-applied, or cold-applied). In general, you'll start by unrolling the membrane and allowing it to relax for a period of time. Apply adhesive to the insulation boards as specified by the manufacturer. Carefully position the membrane and press it firmly into the adhesive. Use a seam roller to ensure proper adhesion along the seams. Overlap the edges of the membrane as recommended by Bauder.
Step 6: Applying Subsequent Layers of Waterproofing Membrane (if applicable)
If your chosen Bauder system requires multiple layers of waterproofing membrane, repeat the process from Step 5 for each layer. Ensure that the seams of each layer are staggered to provide maximum protection against water infiltration. Carefully follow the manufacturer's instructions for the application of each layer.
Step 7: Installing Edge Trims and Flashings
Install Bauder edge trims and flashings around the perimeter of the roof and any penetrations (e.g., vents, skylights). These details are crucial for preventing water from entering at vulnerable areas. Use appropriate adhesive and fasteners to secure the trims and flashings. Caulk any gaps or seams to create a watertight seal.
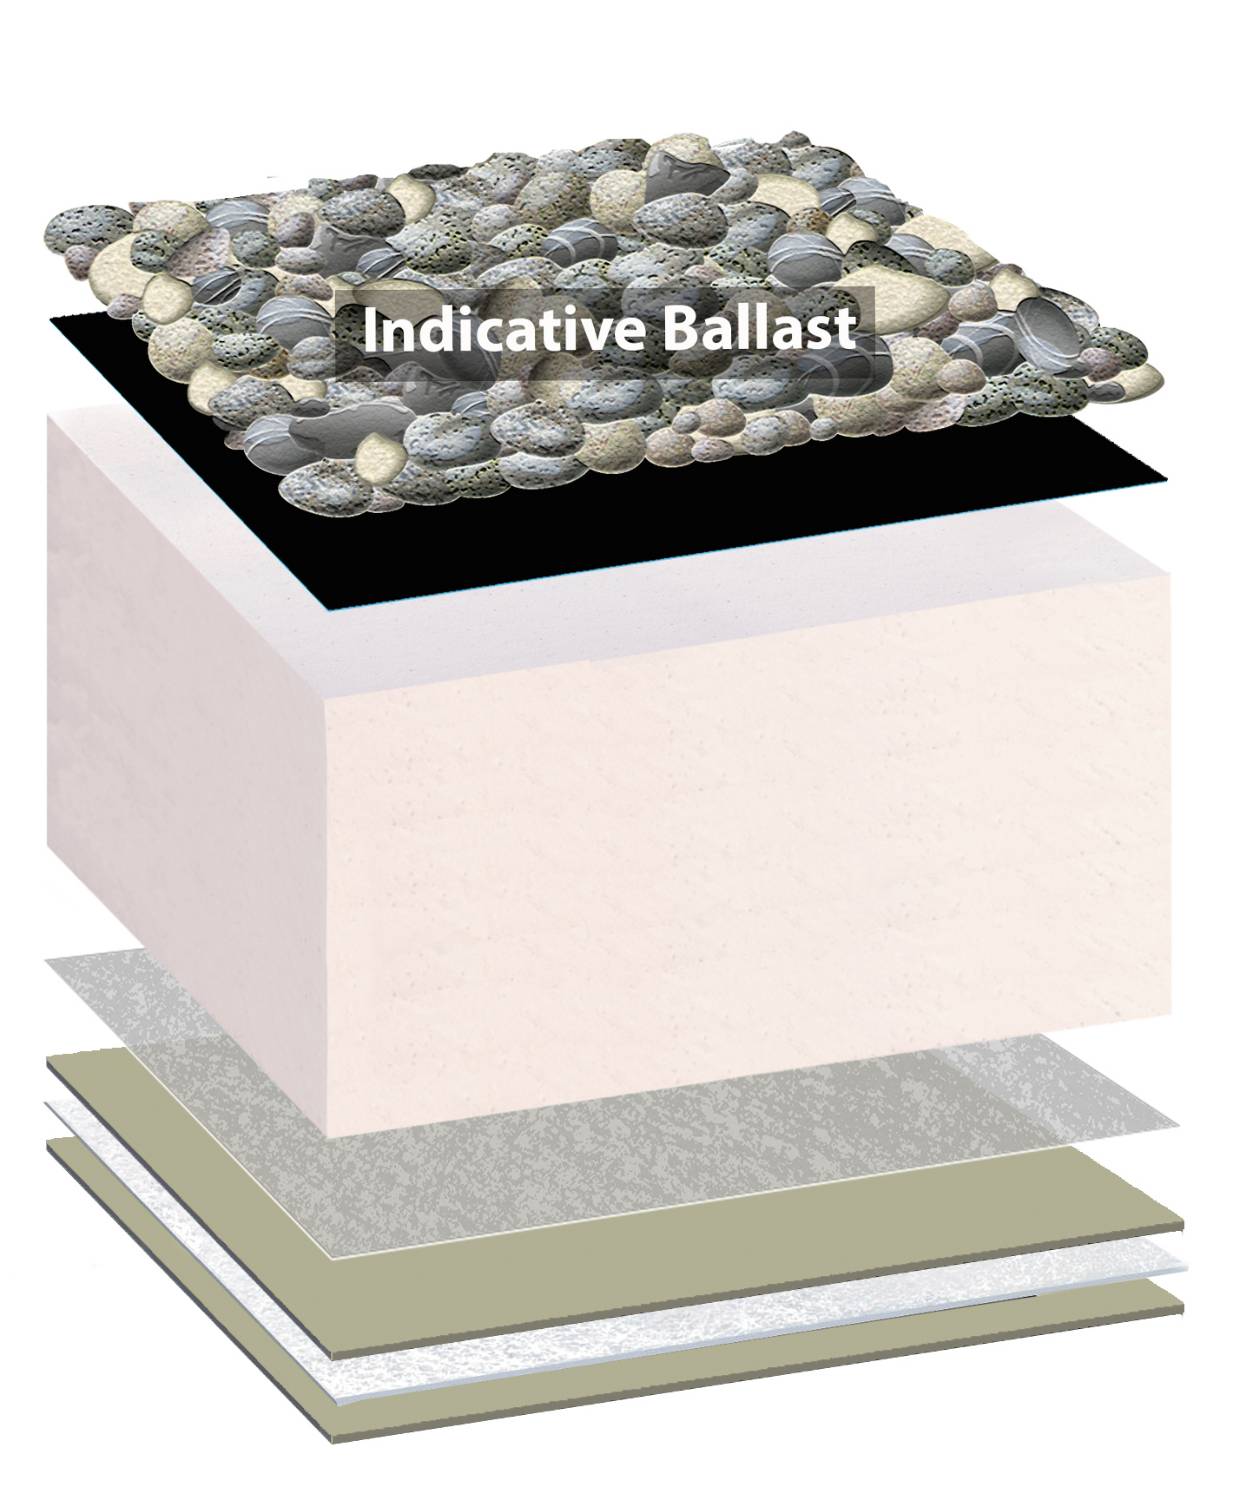
Step 8: Applying Gravel or Ballast (if applicable)
If your Bauder system includes a gravel or ballast layer, spread it evenly over the surface of the roof. This layer provides protection from UV radiation, wind uplift, and foot traffic. Choose a gravel or ballast material that is compatible with the Bauder membrane and meets local building codes.
Step 9: Final Inspection and Cleanup
Thoroughly inspect the entire roof surface for any defects or areas where the membrane may not be properly adhered. Repair any issues immediately. Clean up any debris or excess materials from the roof.
Conclusion: A Lasting and Waterproof Roof
By following these steps and adhering to the Bauder manufacturer's instructions, you can create a durable and waterproof flat roof that will provide years of reliable protection. Remember to prioritize safety throughout the project and to consult with a professional roofer if you have any questions or concerns. Properly installed, your Bauder flat roof will be a valuable asset to your property.
``` Bauder Flatroof Systems Productoverview 0119 En
 www.scribd.com
 Bauder Roof Membrane
 doorroof.deojz.com
 Bauder Liquitec Roof / Terrace Inverted Roof System
source.thenbs.com


0 komentar:
Posting Komentar